For us model railroaders, there is nothing more pleasurable than building structures that have your own fingerprint on them. What I mean is, we can scratch build, kitbash or add the personal touch to a kit by the method we use to finish it. I am always looking for new ways to colour wood and this is something you may wish to try.
SaMaN Water-based stains are designed for staining wood. They can be applied directly with a brush, or they can be rubbed/swiped with a cloth. Another factor is the variety of colours available. The basic stains allow you to use 29 options that can be mixed and diluted to create an unlimited potential of mixes.
What I like is the ability to control the result. This is done by the proportions you use when mixing the colour. Also, how much thinning you do with water or isopropyl alcohol, the amount you apply to the wood, how long you leave it on and whether you rub it in and or remove some in the process while wet. You can also vary the time after application to remove with swiping or rubbing.
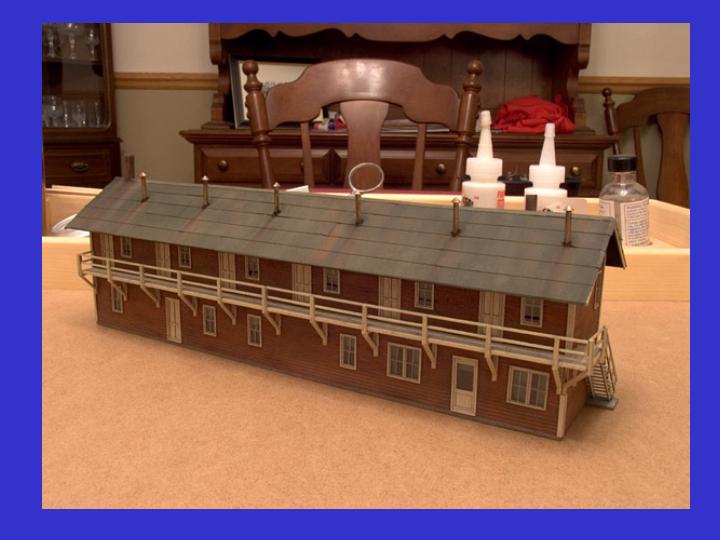
Here is what the bottles look like. They are available in two sizes. Rona and BMR are stores where I have seen the product. They are manufactured in Quebec and are also available on line in North America.
Here is the colour chart. They are free at the counter or can be downlaoded from the SaMaN Website. Suggested mixes of two stains give you a nice variety of colours for your structure. For me this takes me the longest. Experiment on Popsicle sticks till you find what you want. I mix the colours in a separate clear bottle usually found at a plastics or styrene outlet. Sometimes you can find them at a dollar store. Use cheap brushes that have the size to hold the stain but you can control the application. I use flats.
When I first started with staining wood I tried off the shelf stuff like MicroMart Age It and Alcohol india ink (A/I). I was impressed by the way it soaked into the wood and brought out the grain. Also I had learned through several clinics at craftsman Structure Shows that you can distress the wood and this also can age the boards and bring out detail. Other brands are available for Hunter Line as well as home made concoctions.
My first kit was a great learning experience. It was a lasercut model and the different materials (siding and window door peel and stick) took the colour differently and it was hard to control. I liked the process much more than paint because the grain of the wood really came through.
DISTRESS THE WOOD AND STAIN THE WOOD BEFORE ASSEMBLY. Distress by using a wire brush or a channel with seven dull no11 blades. scrape with the grain. Use an eraser or soft cloth to remove fuzz. Also use a chisel blade to lift each row of siding. This creates depth and shadow. This ensures the board ends are distressed and the stain is covering the wood. Also glue will prevent stain from taking and you do not want these spots on your models.

In my second kit I used the SaMaN products. A Banta Bakery converted.into a pool hall. I used a red brown on the front and one side and a dark brown on the back and other side. The siding materials were different so it made sense to me. I used olive green for the trim. After the stains had dried I applied A/I so as to bring out the the distressing and chiseled siding. Another process used to weather the structure is to use weathering powders and or pastels. Black and Earth dark Brown Bragdons were applied to this model sparingly with a flat brush. Just enough to make irregular colour. Try on a separate scrap bit of wood first. These are then blended into the wood with a stiff brush and melted into the wood with a light wetting coat of mineral spirits.

I put the sides together building on the flat. Signs are applied at this time and the windows. Signs are a blast. I spray the coloured surface of the sign with dulcoat. When dry I wet it like a decal then turn it over and with a wet finger gently rub off all the backing so the front of the sign is like a decal. Let it dry and apply either white glue or canopy glued with a finger covering the whole back. Then place the sign on the building and gently work the sign into the siding using a burnishing tool.
In this peanut butter lid diorama I used a light colour wood finish to make it look newer. I found the detail int he wood really popped when the AI was applied after. I made knot holes as well and they can be easily seen.
Taking bigger and bigger steps I them tackled a Sierra West Model. I wanted to simulate the depot buff colour so I went on line and had a look at some colour swaths and what folks did to simulate this paint. Then I took my stains and made a mix to match it. I stared with Colonial and white wash 50/50 and thinned with 25% water. Then I added cappuccino to yellow and darken it for a good match. I again used olive right out of the bottle for the trim. After I just did my A/I and very light earth bragdon thing. This aged the building but not overdone. The loading dock and shed was A/I and earth bragdon applied.
Here you can see the effects of the distressing tool and chisel.
Notice the colour changes with the A/I application.
The Roof was black and chocolate brown mixed 50/50 and 50% water (stained before shingles applied). I also streaked the shingles with bragdon powders on the vertical plane and then ran A/I on them along the vertical plane. When dry I cut the out and randomized the rows before application. After I came back with bragdons around the chimney and pipes.
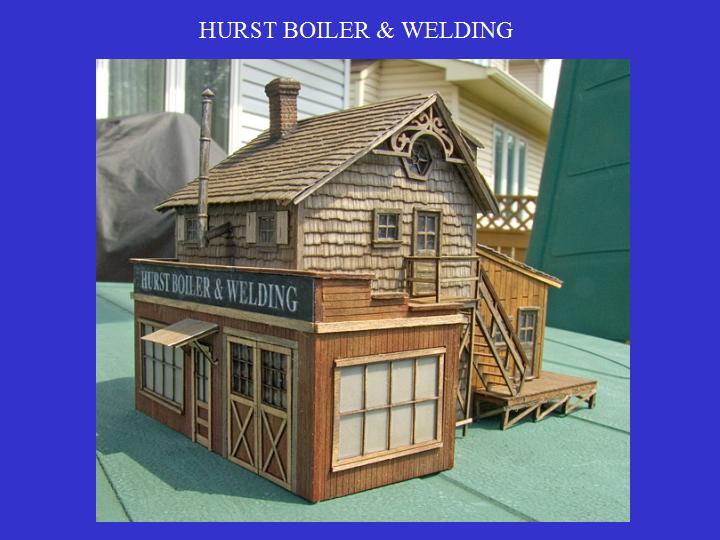
Hurst boiler works was a building that had three sections than in the concept were two add ons to the structure. The siding from Bar Mills was coloured but I added some A/I and Bragdons in places. The doors and windows were painted where plastic but others were peal and stick so I used the black chocolate thinned with water mixture followed by A/.I.
The front was Spice with Earth Bragdons. The trim was Golden Wheat.
The rear section and overhang was cappuccino. The deck was Golden Wheat A/I and earth Bragdons.