
Scenery step by step
As promised. Here is the step by step process of doing this style of scenery.
 As you can see there are a number of products needed. Tape, newspaper, buckets, sprayer, white glue, brown ink, celluclay (grey), ground foams, static grass, toothpicks, Eylmer's spray glue, wet water, dirt and grout. Oh yes. Trees.
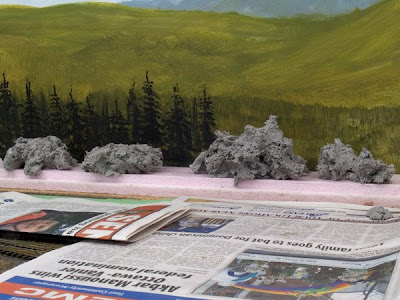 The first step is to lay a long narrow chunk of 1/2 inch foam along the way. This is inexpensive fill that gives some elevation between the track level and the backdrop. Then mix up some celluclay to a mud consistency using water, white glue (2 large blobs) and a couple of drops of dish soap.
 Then take a trowel and spread it over the foam. Try not to be smooth. Create cuts by pressing down along the edges and pushing up here and there.
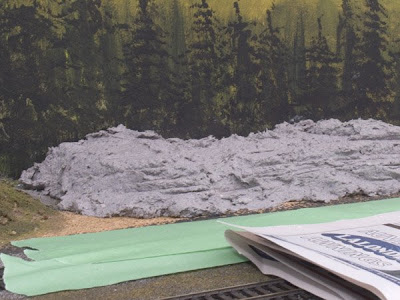
 Make sure you put painters tape over the track and put down newspaper to protect you surfaces.
 Then put diluted white glue over the clay so that it wets all of the surfaces. This provides good contact for the other material you can apply.
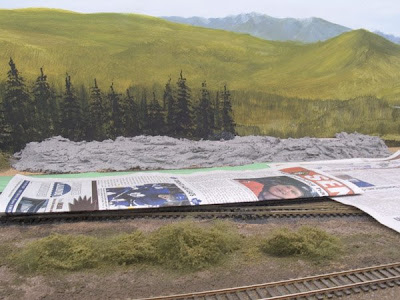
 I take the fine woodland scenics angle hair type material and stretch it out thin and then apply in in small linear clumps between the wall and the new celluclay hills.
I also add dirt and then grout to cover the upper surfaces. Make sure it is random and you let some of the grey show through.
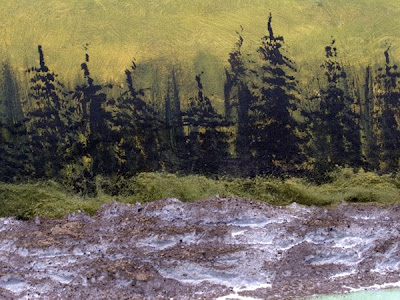
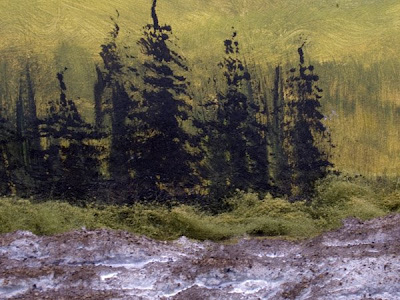
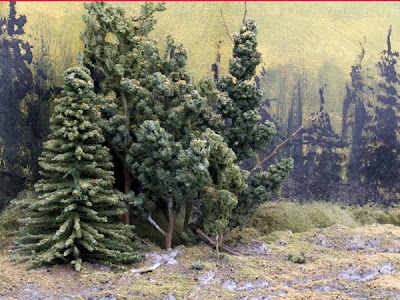 Sprinkle on some mixed grass and then burnt grass ground foam and put in your trees. Starting from one end in the back and working forward. Move to the right and repeat.
Here I am applying some grout over the ground foam. This effect makes it look like the grass is coming right through the dirt. spritz with wet water so the grout dampens then hardens.
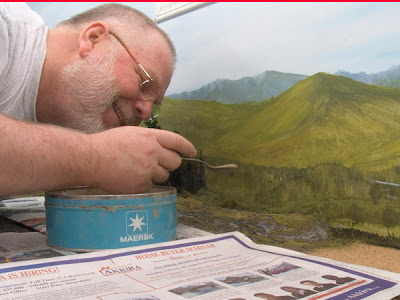
 I also used some Noch static grass applicator action with woodland scenics static grass. I spray with Eylmer's glue and apply it in layers. Medium green covered by burnt grass. Then I again put grout over it in places to create paths and earth areas.
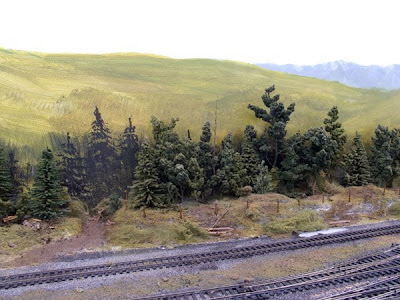
 Here is an overview of the progress.
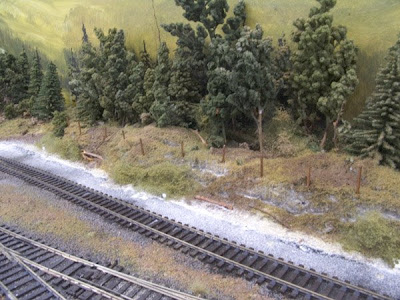
 Lela helped out by staining some toothpicks that I used to make fence posts. These wooden picks were cut in half and stained with brown Warhammer stain (dark brown).
They were applied along the front ridge. This creates interest and depth and defines the scene. Also sticks were broken up and placed along the front edges as well as more bushes similar to the ones created between the hills and the wall.
 I removed the tape and added diluted white glue between the celluclay and the track.
 Added dirt, grout, grasses and bushes. The closeup also shows an elk. When it is dry I will go in and use thread and string three strands of barbed wire. Hope you enjoyed this and it may help you in your scenery endeavours.
 As you can see there are a number of products needed. Tape, newspaper, buckets, sprayer, white glue, brown ink, celluclay (grey), ground foams, static grass, toothpicks, Eylmer's spray glue, wet water, dirt and grout. Oh yes. Trees.
 The first step is to lay a long narrow chunk of 1/2 inch foam along the way. This is inexpensive fill that gives some elevation between the track level and the backdrop. Then mix up some celluclay to a mud consistency using water, white glue (2 large blobs) and a couple of drops of dish soap.
 Then take a trowel and spread it over the foam. Try not to be smooth. Create cuts by pressing down along the edges and pushing up here and there.
 Make sure you put painters tape over the track and put down newspaper to protect you surfaces.
 Then put diluted white glue over the clay so that it wets all of the surfaces. This provides good contact for the other material you can apply.
 I take the fine woodland scenics angle hair type material and stretch it out thin and then apply in in small linear clumps between the wall and the new celluclay hills.
I also add dirt and then grout to cover the upper surfaces. Make sure it is random and you let some of the grey show through.
 Sprinkle on some mixed grass and then burnt grass ground foam and put in your trees. Starting from one end in the back and working forward. Move to the right and repeat.
Here I am applying some grout over the ground foam. This effect makes it look like the grass is coming right through the dirt. spritz with wet water so the grout dampens then hardens.
 I also used some Noch static grass applicator action with woodland scenics static grass. I spray with Eylmer's glue and apply it in layers. Medium green covered by burnt grass. Then I again put grout over it in places to create paths and earth areas.
 Here is an overview of the progress.
 Lela helped out by staining some toothpicks that I used to make fence posts. These wooden picks were cut in half and stained with brown Warhammer stain (dark brown).
They were applied along the front ridge. This creates interest and depth and defines the scene. Also sticks were broken up and placed along the front edges as well as more bushes similar to the ones created between the hills and the wall.
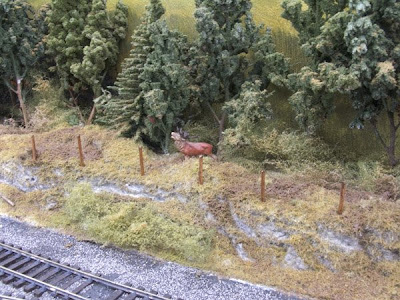
I removed the tape and added diluted white glue between the celluclay and the track. Added dirt, grout, grasses and bushes. The closeup also shows an elk. When it is dry I will go in and use thread and string three strands of barbed wire. Hope you enjoyed this and it may help you in your scenery endeavours.
posted by Chris Lyon | 4:56 AM
![]()
1 Comments:
Great post! Please keep em coming, this is what makes this hobby the world greatest hobby: people who want to share their knowledge.
Post a Comment
<< Home