Ron was kind enough to give me this kit to build for him. Made in England it is Resin.

I cleaned the parts with dish soap and water and removed flash (very little on thhis kit). ..Made sure the parts were square. They were and then I glued the frame to the deck.


Then I used white primer as the colours were goint to be bright rather than toned down if you used black primer.


Then I used Tamya and Velerro paint to put a base coat on the parts. I also added some warhammer chestnut ink over the brown to rust the wheels. The roof had grey bragdons rubbed into a krylon aluminum application

I painted the truck side frames black then dry brushed them with chainmail to give it a metalic look and draw out the details.

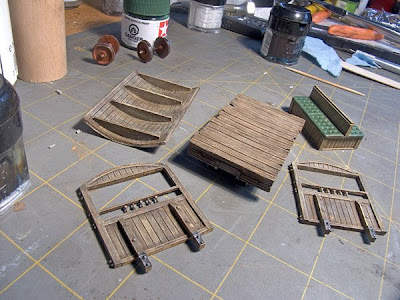
I took dark brown bragdons and applied it to the wood areas. Then I used mineral spirits to move it into the grain of the wood to create contrast.

A good shot of the metal finish

Here is the place where I apply the bragdon powders. I peanut butter lid.

After the mineral spirits dry you can see it becomes light in colour. The middle bit is still wet and you can tell by the dark finish.
Then I added micro-mark grey age-it over all the parts and let dry. It makes it become older and warn.

Now for assembly

The seating and ends are glued on. I found the frames to be too black so I added mahogany ink over them to rust it a bit.


Then on went the roof. I used the bragdons to tone down the aluminium so there was more harmony across the model.

The couplers were added and painted as well


It looks just great in the scenery on the LVN.
Enjoy Ron.

 Second Place Colour Prototype Print
 First Place colour prototype print
 First place Black and White Prototype Print
 First Place Colour Model print
 Third Place
 Second Place
 Second Place Colour Prototype Print
 First Place colour prototype print
 First place Black and White Prototype Print
 First Place Colour Model print
 Third Place
 Second Place


